Login via OIDC provider
How to configure login via an OIDC-compatible identity provider
OpenID Connect (OIDC) is an open authentication protocol and an extension to OAuth2. OIDC specification describes standardised authentication flows that are implemented by numerous identity providers (such as Google, Microsoft, LinkedIn etc.) and servers (for instance, the highly popular, open-source Keycloak IAM server).
Comentario allows for an easy OIDC provider setup thanks to the OIDC Discovery mechanism, which automates configuring the necessary settings. One of the few necessary things you need to provide is a server URL, which Comentario will use to discover the rest of the configuration.
To add authentication via a (generic) OIDC-compatible provider, follow the below steps.
- Choose an ID you’ll use to identify your provider with. It has to consist of lowercase letters
a-z, digits, and dashes only. For example,linkedinormy-keycloak. - Configure a new Client application in your OIDC server. The exact procedure depends on the particular server product, but in most cases that means providing an application name, authorisations (scopes), and a callback URL:
- Application name can be any descriptive label, such as “My Comentario”. The user will most likely see this label on the consent screen when logging in.
- Available application scopes are defined by the server; they must at least include user name and email address (read-only is sufficient).
- Callback URL is built from your Comentario URL and the provider ID chosen in the step 1 (replace
<PROVIDER_ID>with that ID):https://<your-comentario-domain>/api/oauth/oidc:<PROVIDER_ID>/callback
- Once you’ve added the application, you’ll be shown a Client key and a Client secret.
- Update the secrets configuration with the data from the previous step.
Specify the OIDC endpoint URL for theurlvalue. It’s easy to check whether it’s correct by navigating to<url>/.well-known/openid-configuration: you should see a JSON describing the server’s OIDC configuration.
...
idp:
  oidc:
    - id:     my-server                             # Use the ID from step 1
      name:   My Identity Server                    # This label will appear in Comentario login dialog
      url:    https://www.myserver.url/path/to/oidc # Put the actual OIDC URL here
      scopes:
        # The below is an example, use the actual application scopes here
        - profile
        - email
      key:    5t02cn8y5609c28uh                     # This is your Client key
      secret: ghc02m84tgh8c2gjh                     # This is your Client secret
...
- Restart Comentario.WARNINGComentario will not start if the provided configuration is incomplete or incorrect, including situations when requesting the
.well-known/openid-configurationdocument from the server fails for any reason. - You should now see your provider name (“My Identity Server”) under Configured federated identity providers on the Static configuration page of the Administration UI.
- Still in the Admin UI, navigate to the desired domain properties and tick off that provider on the Authentication tab, then click Save.
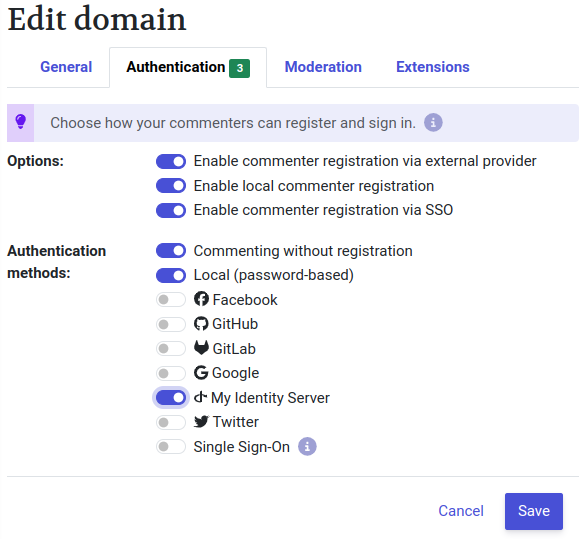
That’s it! Your users should now be able to login using the My Identity Server button in the Login dialog.
Examples of OIDC configurations
Below you can find some examples of common OpenID Connect (OIDC) providers.